By the PetriPrinter progam you can print structures of various geometries into petri dishes.
Usage
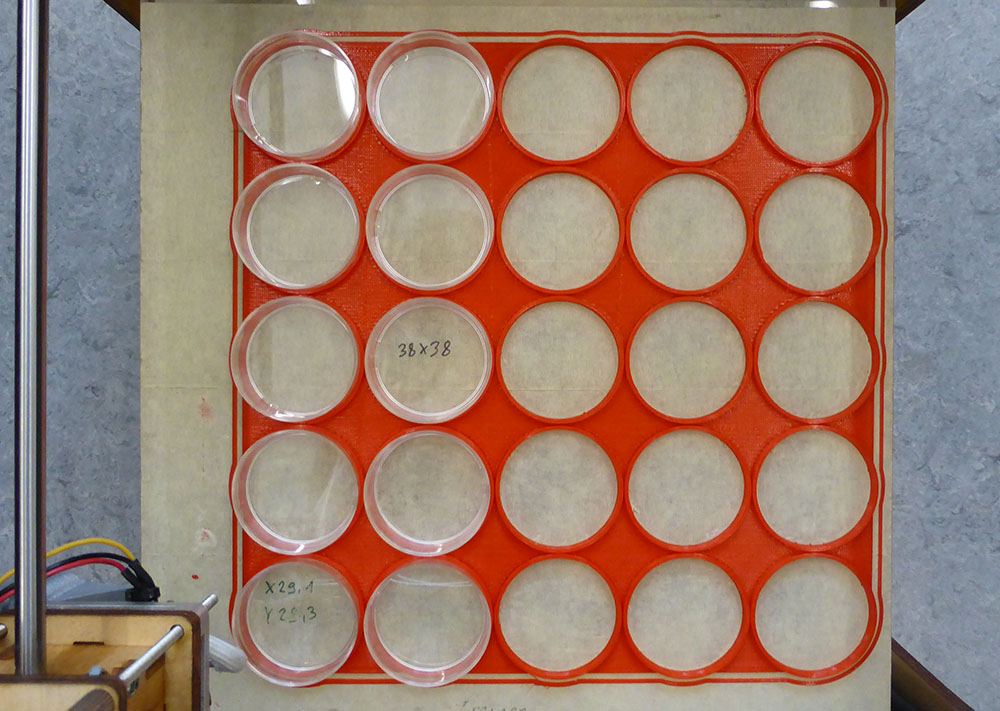
1. Insert petri dishes in a grid position on the printer stage.

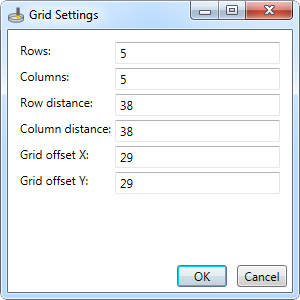
2. Set parameters of the grid. Click on the Settings menu and select the Grid element.
- Rows: Number of rows
- Columns: Number of columns
- Row distance: Distance between the centers of two petri dishes in the vertical axis
- Grid offset X: X offset of bottom left dish center
- Grid offset Y: Y offset of bottom left dish center

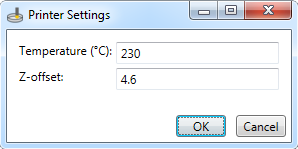
3. Set the parameters of the printer. Click on the Settings menu and select the Printer element.
- Temperature: Printing temperature in Celsius
- Z-offset: Printing offset on the Z axis (Height of dish spacer).
Note: The last settings of grid and printer are stored so repeated setting is not necessary after a restart.

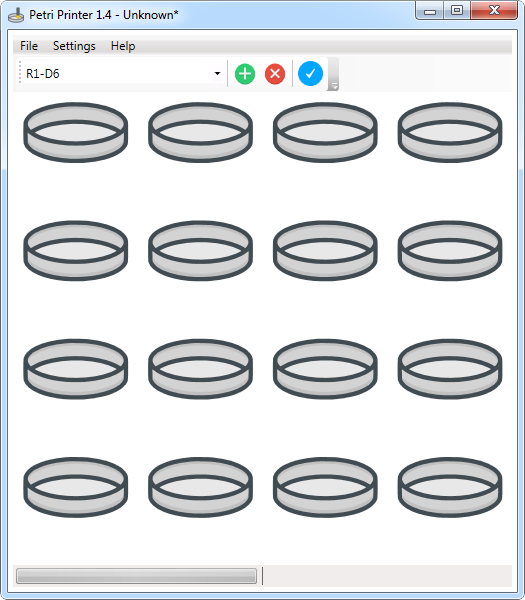
4. Click into empty gray dishes where you would like to print. The selected circles becomes red.
5. Select the requested model from the combobox.
6. Click the  symbol to set the selected model into the selected petri dishes. After that the color of selected dishes becomes green. Click the
  symbol if you would like to clear the selected dishes. After that the color of selected dishes becomes green again.
If it is necessary you can select new dishes and set new models.
7. Finally, click the  symbol to generate the g-code file. Save the file. Open it with the control program of your printer and start printing.

Models
The PetriPrinter program works with Petri Task Files (*.ptf) and Pyton Script Files (*.py). These files store available models. For creating these files please see the descriptions of the Petri Task File and Pyton Script Files.
You can easily add new model files to the PetriPrinter program. Copy the ptf or py file into the \Documents\PetriPrinter folder then restart the program. The new model files will be loaded automatically.
You can download several useful models from our Model Store and you can share your models with the PetriPrinter Community.